When installing apt-fast in Ubuntu via
its PPA, the package asks you if you want to use aptitude or apt-get,
what download manager to use (axel or aria2c). If, later on, you want to
change some of the apt-fast options, use the following command:
sudo dpkg-reconfigure apt-fast
aria2c is the download tool recommended by the apt-fast developers, mostly because it supports resuming downloads.
For other Linux distributions, you can download apt-fast from GitHub.
Windows 8's tile-based
interface puts a bold new spin on the familiar Windows interface—so bold
that many long-time Windows users are threatening to jump ship to
another operating system rather than learn Microsoft's "modern" UI. Of
course, you'll still find yourself in foreign territory even if you
actually follow through and make the jump. Installing a new operating
system is easy, but wrapping your head around an alien environment can
be more difficult, even if you're using a comparatively user-friendly OS
like Ubuntu Linux.
Luckily, Linux is customizable—much, much more than Windows. In fact,
if you're having trouble with the transition (or plopping Ubuntu on a
parent's PC), you can tweak and tune the OS to feel pretty darned close
to the Windows environment you've forsaken.
I’ll go through two methods here. One adapts Ubuntu’s default Unity
desktop to make it feel slightly more like Windows, while the other
entails a bit more work and a different desktop interface entirely to
create a truly Microsoft-like experience.
Creating a Windows 7-style Ubuntu
Ubuntu's default desktop is clean, but not very Windows-like.
To be completely honest, Ubuntu's default Unity desktop may be slick
and pretty, but it isn’t the most configurable Linux environment around.
The taskbars running the top and left sides of its screen are locked in
place and can’t be moved whatsoever. Unity is still fairly flexible,
however, and some basic—for Linux—tweaks can give it some of that old
Windows 7 charm.
A quick note: These tips were tested on Ubuntu 12.10, the most current version of the operating system at the time of publication.
We’re going to use some terminal commands throughout the course of
this article. If you’re a new Linux user, don’t be scared—Linux’s
powerful command line makes it easy to follow instructions you’ll find
in articles like this one. Instead of following a list of long steps
telling you to click here and click there, you can just copy and paste
these commands into a terminal window and hit Enter.
To open a terminal, press the Windows key (known as the Super key in Linux), type Terminal, and press Enter. You can also click the Ubuntu logo at the top-left corner of your screen instead of pressing the Windows key.
We're getting there...
First, we’re going to install a Windows 7 theme pack. Copy and paste
the following commands into the terminal window in order, pressing Enter
after each command to run it. The first command adds a personal package
archive (PPA) to your system that Ubuntu can install packages from. The
second command downloads information about the newly available
packages, and the third command installs the Windows 7 theme—no
installation wizard required. Typing sudo before each command allows it to run with root permissions, similar to running a program as administrator in Windows.
The Win2-7 theme is now installed. To enable the icon, window border,
and widget theme, copy and paste the following commands into the
terminal. As you run each command, you’ll see your desktop gradually
transform and become more Windows-like.
gsettings set org.gnome.desktop.interface gtk-theme 'Win2-7-theme' gsettings set org.gnome.desktop.wm.preferences theme 'Win2-7-theme' gsettings set org.gnome.desktop.interface icon-theme 'Win2-7-icons'
The taskbar-like launcher at the left side of your screen will still
be a different color. Never fear—like Windows 7’s taskbar, the launcher
derives its colors from your desktop wallpaper. For this article, we’ll
use Windows 7’s default wallpaper, which you can find all over the
Internet. (I snagged my copy from an old ZDNet post.) If you’re using Firefox on Ubuntu, right-click the full-size wallpaper image in your browser and select Set as Desktop Background.
You’ll also want to move the window management buttons—close,
minimize, and maximize— located at the top-left corner of each window by
default. Use this command to put them in a Windows-style order:
gsettings set org.gnome.desktop.wm.preferences button-layout 'menu:minimize,maximize,close'
To remove the Mac-style global menu bar and put the menu bar
(containing File/Edit/View) back into each individual application
window, run this command:
You’ll have to log out and log back in for this change to take
effect. Use the button at the top-right corner of your screen to log
out.
Behold Windows and Ubuntu's love child!
Do you like what you see? This is as close to Windows 7 as we’re
going to get with Ubuntu’s default Unity desktop environment. If it
doesn't quite scratch your itch, keep reading to learn how to create a
more traditional Windows 7-style look using the Xfce desktop
environment.
Installing and customizing Xfce
For this method, we’ll be throwing Ubuntu’s default Unity desktop out
and going our own way. (Okay, we’re not actually throwing it out, just
selecting a different environment on the login screen). Xfce is one of
the most popular desktops that still offers a lot of configurability.
Install it with this command:
sudo apt-get install xubuntu-desktop
Log out of Ubuntu using the menu at the top-right corner of the
screen and click the icon next to your name on the login screen. Select Xubuntu session and log in normally. (You can install multiple desktop environments and toggle between them on the login screen like this.)
Xfce also uses a two-panel layout by default. We’ll have to do some
heavy customization to get it looking more like Windows 7, but it’s all
graphical—if you’re a Windows power user, you’ve done this kind of
tweaking many times before.
First, get rid of the top panel. Right-click it, point to Panel, select Panel Preferences, and click the red Remove button. Use the drop-down box in the panel configuration window to select the other panel. Uncheck the 'Automatically show and hide the panel' option and check the 'Automatically increase the length'
option. Now we’re getting somewhere! At this point, you should have a
single taskbar-like panel across that bottom of your screen.
Use the buttons on the Items panel to remove the items you don’t
want, add the items you do want, and reorder them as you see fit. For a
Windows 7-style taskbar, try using these items in the following order:
Applications Menu, Separator, Launcher, Window Buttons, Separator, Notification Area, Indicator Plugin, Show Desktop.
The item options for Xfce's panel are nice and simple.
Add as many launchers (read: shortcuts) as you like to the launcher
section and think of them as your new quick launch bar. Unfortunately,
Xfce can’t group applications and open windows the same way Windows 7’s
taskbar can, so it’s a bit more old school.
To configure an item, select it in the list and click the Gear button. You’ll also want to disable the 'Show button title' option in the Applications Menu item’s settings.
Theming Xfce to look like Windows
Now we just have to make Xfce look more like Windows 7. If you didn’t
run any of the commands in the Unity section above, run the commands
below in a terminal. (Right-click the desktop and select 'Open terminal here' to open a terminal in Xfce.)
sudo add-apt-repository ppa:upubuntu-com/gtk3 sudo apt-get update sudo apt-get install win2-7 gsettings set org.gnome.desktop.wm.preferences theme 'Win2-7-theme' gsettings set org.gnome.desktop.wm.preferences button-layout 'menu:minimize,maximize,close'
Open the Settings Manager from the applications menu and click the Appearance icon. Select Win2-7-theme in the Style list and select Win2-7 in the Icons list.
Press Alt+F2 and run the following command to get Windows 7-style
window borders. If you're typing this out rather than copying and
pasting, note that the command includes a double-dash, not a long em
dash.
metacity --replace
Go into the Session and Startup panel in the Settings Manager, select the Application Autostarttab, and click the Add button. Enter Metacity as the application’s name and metacity --replace as its command. Now Windows 7-style window borders will automatically start with your desktop.
To make your panel look more like Windows 7’s panel, right-click it, point to Panel, and select Panel Preferences. On the Appearance tab, select Background image
and browse to the \usr\share\themes\Win2-7-theme\gtk-2.0\Panel\
directory on your computer. Select a background image like
Panel_Win2-7Basic800.png. The theme pack we installed includes a variety
of panel backgrounds, so feel free to experiment.
You can also change the applications menu’s graphic and make it use a
Windows 7-style start orb. First, find a Windows 7 start orb image—you
can find several on Google Images, but make sure you get a transparent
PNG image. Once you’ve found a good image, right-click the Applications menu button, select Properties, and use the Icon button to select your start orb.
Here it is: A Linux OS in Windows clothing, perfect for those afraid of change.
Phew, that took a lot of tweaking (and a lot of text)—but we now have
a Windows 7-style desktop on Ubuntu. It lacks a Windows 7-style Start
menu and taskbar, but Windows users that prefer the classic Start menu
and taskbar behavior will find it immediately familiar.
Undoing your changes
Want to undo your changes? If you followed the first method, just run
these commands. Remember to log out and log back in after running the
commands to restore the global menu bar.
If you followed the second method, log out and select Ubuntu’s
default desktop environment from the login screen. You can toggle
between the two whenever you like. If you’d like to uninstall Xfce, use
this command:
sudo apt-get autoremove xubuntu-desktop
These processes are a good demonstration of just how configurable
Linux is. You can rip out software from the default desktop, use all
sorts of themes, install a completely different desktop environment, or
even build your own desktop environment by cobbling together pieces from
different desktop environments—that’s what we did in the last section.
By default Windows 7 and Ubuntu 12.04 come with Public Folders that
you can use to share files with anyone, even to someone without a local
account. This can come in handy if you need to quickly make a public
file available to all users on the system or network without worrying
about permissions.
This brief tutorial is going to show you how to
make that happen in both Windows 7 and Ubuntu 12.04 (Precise Pangolin).
Windows 7 and Ubuntu 12.04 may be different, but are almost similar in
many functions. Almost everything you do in Windows 7 can be done in
Ubuntu 12.04.
So, without wasting anymore of your time, let’s get going.
Objectives:
Enable Public Folders Sharing in both Windows 7 and Ubuntu 12.04
Enjoy1
Enabling Public Folder Sharing in Windows 7 without Passwords
To enable other users to access public folders in Windows 7 without passwords, go to Start –> and search for ‘Manage Advanced sharing settings’
Finally, ‘Turn off password protected sharing’ and click ‘Save changes’
Restart your computer and you’re done.
Enabling Public Folder Sharing in Ubuntu 12.04 (Precise Pangolin)
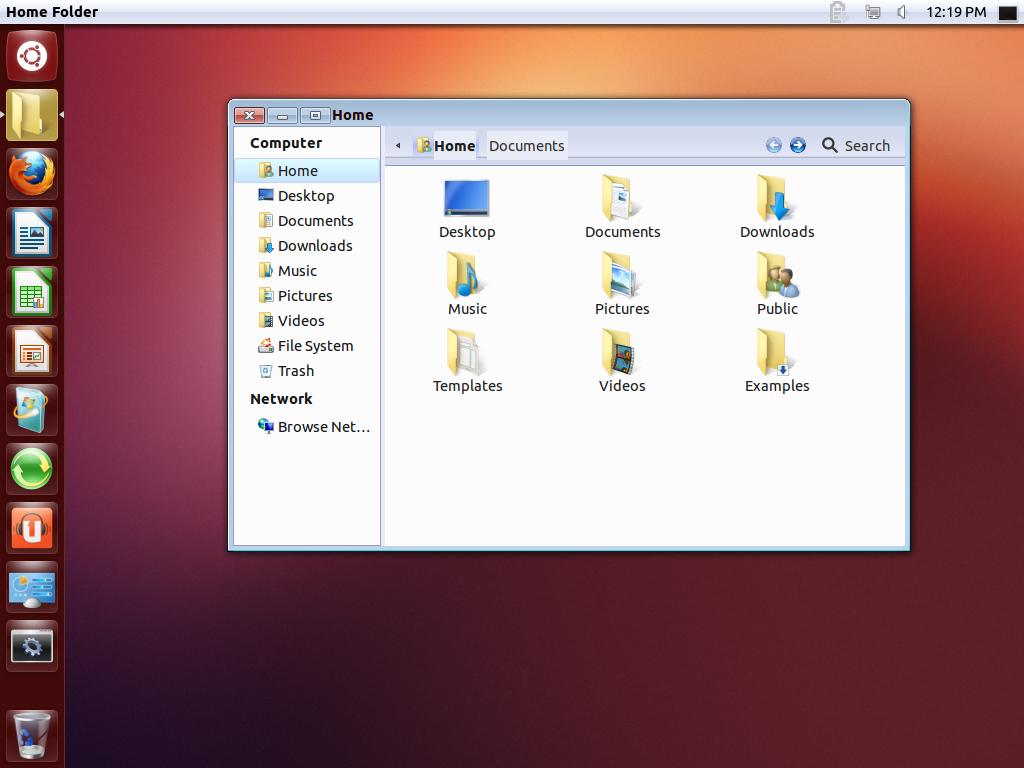
To share your Public Folder in Ubuntu, go to your home directory and right-click on the Public Folder, then select ‘Sharing Options’
Next, click the box to share this folder and install the services when prompted to do so.
Then allow Guest access as well and set the permissions as you wish. Finally, click ‘Create Share’
Restart your computer and users on both machines should be able to access the Public Folder with authentications.
Many
users like Linux Mint than other distro's. Linux Mint is based on
Ubuntu and release after Ubuntu. Here are some tips for Linux Mint 13
Maya.
Clarified these points, we proceed to list some things that can make life easier after installing the new version of Mint:
1. Run the Update Manager
Install Latest updates in your system, there may have come new updates
since you have downloaded the iso. So you can check for updates from the
update manager (Menu > Administration > Update Manager) or Enter
following command:
sudo apt-get update && sudo apt-get upgrade
2. Install the graphics card drivers
If you have proprietary cards you can install drivers from repositories.
Go to Menu-Preferences > Additional Drivers install driver you want
to install in Mint, Also you can update and change (if you wish) the
driver of the graphics card you have.
3. Customizing the Appearance
There are many ways to do this, and all are free! In http://gnome-look.org/
we have a large database of wallpapers, themes, tools and other items
that will help us "lookear" our desktop. We can also make use of
well-known 3 tools: 1. Docky , a shortcut bar for our desktop and applications. Official Website:http://wiki.go-docky.com/index.php?title=Welcome_to_the_Docky_wiki . Installation: In a terminal type:
sudo apt-get install docky
2. AWN , another navigation bar, almost docky competitor! Official Website:http://wiki.awn-project.org/ Installation: from the Program Manager.
3. Conky , a system monitor that displays information from
various components such as RAM, CPU usage, time of system, etc.. The
great advantage is that there are many "skins" for this application.
Official Website: http://conky.sourceforge.net/Installation:
sudo apt-get install conky
4. Restrictive install fonts
If required we install type the following commands in a terminal:
sudo apt-get install ttf-mscorefonts-installer
Accept the license terms and conditions with TAB and ENTER.
5. Install programs to play
Besides the great library of games that have repositories,
http://www.playdeb.net/welcome/ also have another page that specializes
in collecting games for Linux systems. Deb packages. If you also want to
enjoy our games in Windows, do not despair, because we have some
alternatives: 1. Wine (http://www.winehq.org/) provides the compatibility layer to run not only games but also all software compiled for Windows
2. PlayOnLinux (http://www.playonlinux.com/en/) another resource that provides a library able to install and use software designed for Windows
3. Lutris (http://lutris.net/) a gaming platform developed for GNU / Linux, a great resource despite being in development stages.
6. Install audio plugins
Some, like GStreamer or Timidity will help us expand our list of
supported formats, both are in the Program Manager or can be installed
using the command sudo apt-get install. We mention pulseaudio-equalizer
software, capable of giving us a configuration of Pulse Audio and
improving sound quality, we use 3 commands to install:
Alhamdulillah, dapat juga akhirnya walaupun lambat. Baru-baru ni aku dapat cek hasil dari menyertai program survey di Internet. Ingatkan program spam, rupa-rupanya memang betul dapat duit. Walaupun agak lambat tetapi survey yang aku sertai ini memang boleh buat duit. Namun begitu kita juga perlu berhati-hati apabila ingin menyertai sesuatu program yang menawarkan duit di internet ini. Maklumlah sekarang ini pelbagai program yang menawarkan wang segera untuk cepat kaya. Akhirnya terbukti program itu spam. Jadi berhati-hati dan buat sedikit pencarian di internet untuk memastikan program itu betul atau tidak.
Untuk program survey yang aku sertai ini memang betul dapat duit. Survey akan dihantar melalui email dan antara survey yang dihantar adalah berkaitan dengan barangan elektornik, perubatan, perumahan dan makanan. Setiap survey yang kita jawab akan diberi point untuk dikumpulkan sehingga mencapai 1000 mata , barulah dapat ditukar kepada duit, 1000 mata bersamaan USD50. Cek akan dihantar kepada kita setelah ditukar kepada RM. Sesiapa yang ingin menyertai program ini bolehlah hantar email kepada saya.
Set of fonts including .gif preview, In this pack there are fonts
such as: 3D fonts, Abstract fonts, Animal fonts, Arabic fonts,
Bitmap/Pixel fonts, Brush fonts, Cartoon fonts, Calligraphy fonts,
Celtic fonts, Christmas fonts, Comic fonts, Computer fonts, Curly fonts,
Decorative fonts, Distorted Dotted fonts, Famous fonts, Fire fonts,
Gothic fonts, Graffiti fonts, Greek/Roman fonts, Handwriting fonts,
Headline fonts, Horror/Thriller fonts, Ice/Snow fonts, Italic fonts, LCD
fonts, Medieval fonts, Mexican fonts, Modern fonts, Old English fonts,
Old School fonts, Old Style fonts, Outline fonts, Retro fonts,
Rock/Stone fonts, Rounded fonts, Russian fonts, Sci Fi fonts, Typewriter
font, Western fonts and other.
a few example fonts you might find in pack
size: 50,1 Mb
download: http://hotfile.com/dl/20274642/8b57b89/fonts_pack.zip.html
Totally free small fonts, set of 23 small fonts in TrueType format.
Quality pixel fonts to everyone. The fonts can be used free for any
personal or commercial projects. Base size: 8 points / Tracking
(Photoshop): 0, 125, 250…
Smooth edges (super pixel font)
licence: Free
fonts in pack: 23 fonts
format: TTF
size: 223 KB
download: small-pixel-fonts.zip
Attention all Jedi fans !!!. Download now free collection of Jedi
fonts. There are 11 fonts. All fonts are in TTF (TrueType) format ready
to use. Enjoy !!
keywords: star wars, fonts, font, star wars font, fonts collection, fonts set, font, gerge lucas, movie fonts, jedi fonts, jedi
Below are several Freeware Fonts for download and use.
author: Davide Canavero
size: 170 Kb
format: TTF (TrueType)
Today I found free creative font created by Keepa studio. Contain all
capital letters of English language, no numbers. Very funny colorful
font, and good looking on both. Great for kids. All letters are fully
editable PSD format.
keywords: PSD fonts, PSD font, party font, funny font, colorful psd font, PSD file
author: Keepa
size: 10 Mb
format: psd
Attention all typography fans, today you can download free collection
of unique fonts. All fonts are in TTF (TrueType) format and ready to
use. This huge pack contains more than 450 unique fonts with previews
and licence files. This is the essential pack for all designers and
typography fans.
keywords: download fonts, calligraphy fonts, unique fonts, web fonts, tatto fonts, gothic fonts, fonts for logos
size: 29.7 Mb
fonts in pack: +450